Note: This is based on Pieter's post on servethehome.com and describe how I managed to flash my M1015 card with a UEFI based ASUS mainboard.
Step 1: Get the firmware and flash tool
Download this zip archive and extract it somewhere and your hard drive: M1015_to_LSI9211-8i.zip (12.70 mb)
The firmware in this package is already the latest release P15 (November 2012) by LSI.
You can check here if there is a never version available when you read this.
I also added Intel's Tianocore EFI Shell 1.0 (shellx64.efi) that we need later for flashing.
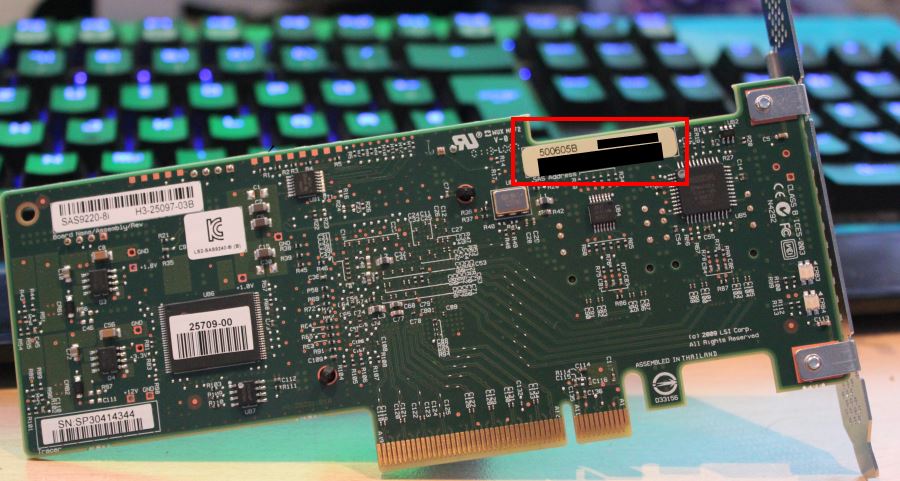
Step 2: Get the SAS address of your card
We need this address later for flashing and you can find it on a green sticker on the backside of the card.
It should start with "500605B" fallowed by some hyphen separated groups of digits and letters.
Take a photo or write it somewhere down:
Step 3: Prepare the FreeDOS USB boot stick
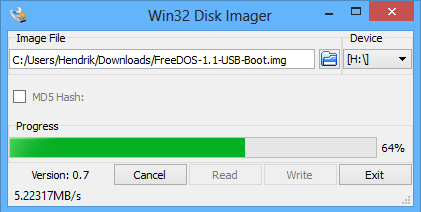
Download the FreeDOS 1.1 USB Boot Image here and the Win32 Disk Imager here.
Open "FreeDOS-1.1-USB-Boot.img.bz2" with 7zip or Winrar and extract the "FreeDOS-1.1-USB-Boot.img" image file.
Start the Win32 Disk Imager, select the extracted image file and your USB stick and press "Write":
When done copy all the file from the extracted firmware archive on the top to the root of the USB stick (should now named like "FREEDOS1~1A").
Step 4: Delete the existing firmware from the chip
Restart you computer and boot from the stick (I have to press "F8" to enter the boot menu).
When started enter this two commands:
megarec -writesbr 0 sbrempty.bin
megarec -cleanflash 0
Step 5: Flash the new firmware
Now comes the tricky part.
When using the "sas2flash.exe" from FreeDOS you will get an error like "ERROR: Failed to initialise PAL. Exiting Program."
In order to flash with a UEFI mainboard we need to use the "sas2flash.efi" file that require to execute it from a EFI shell.
As I already said on the top the firmware archive contains a file named "shellx64.efi" this is such a shell.
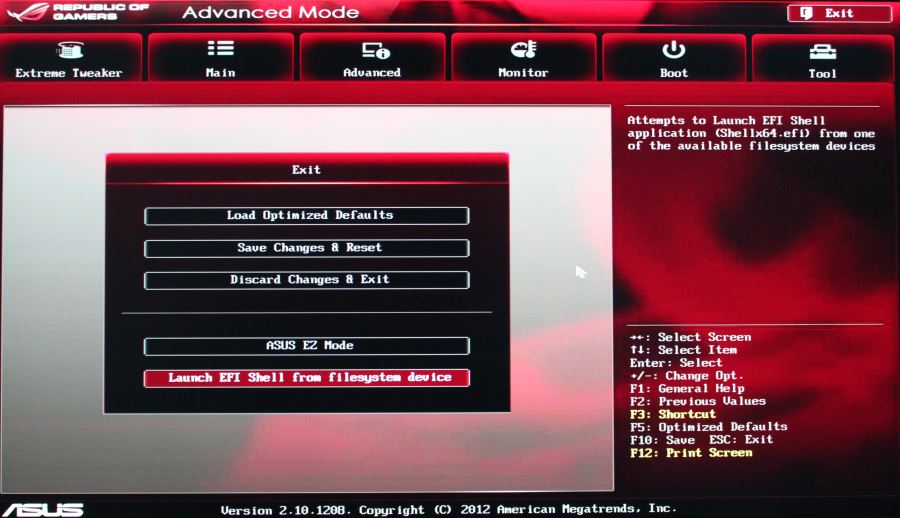
My mainboard (ASUS Maximus V Extreme) want this "shellx64.efi" file on the root of the stick, however if you have another manufacturer you probably have to search how to start this shell.
In my case I need to enter the UEFI (pressing "Delete" on start up) click "Exit" and select "Launch EFI Shell from filesystem device":
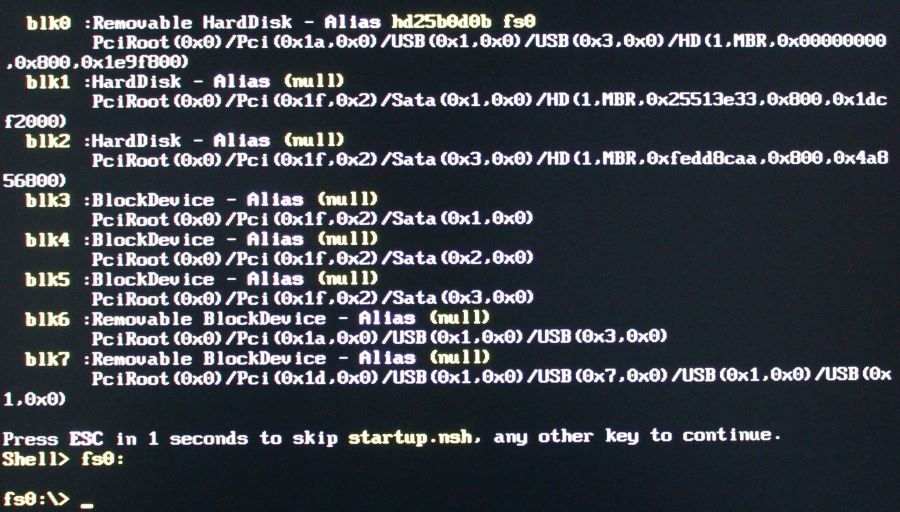
When the shell has been loaded enter "fs0:" to switch to the USB root directory. Your screen should now look like this:
Now enter this to flash the card into the LSI9211-IT mode (pass through, no RAID):
sas2flsh.efi -o -f 2118it.bin -b mptsas2.rom
sas2flsh.efi -o -sasadd 500605b[THE REST OF YOU ADDRESS WITHOUT HYPHENS]
To flash other modes take a look at Pieter's post on the top.
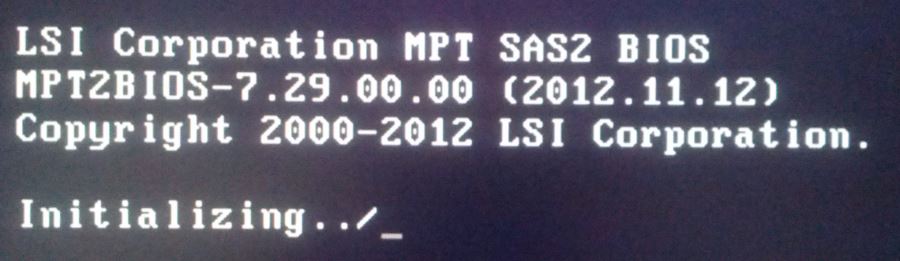
You're done
When you now reboot you should see the new firmware on the card: