28. December 2012
Hendrik
This should be the start of a series of post about how to install and configure CruiseControl.NET on a Windows Server 2012 system.
In the next upcomming posts I will also show you how to compile C#/C++ project, run unit test, setting security permissions and some more advanced stuff.
Setting up the IIS:
First of all we have to install and configure the IIS on our system.
- Open the Server Manager
- On the welcome screen, click "Add roles or features"
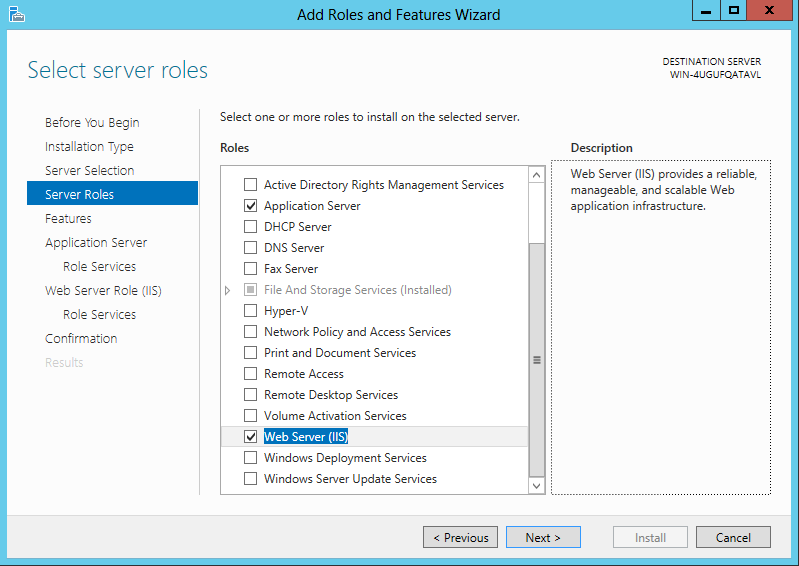
- When the wizard has been opened, click "Next" until you reach the "Server Roles" section and select "Application Server" and "Web Server (IIS)":
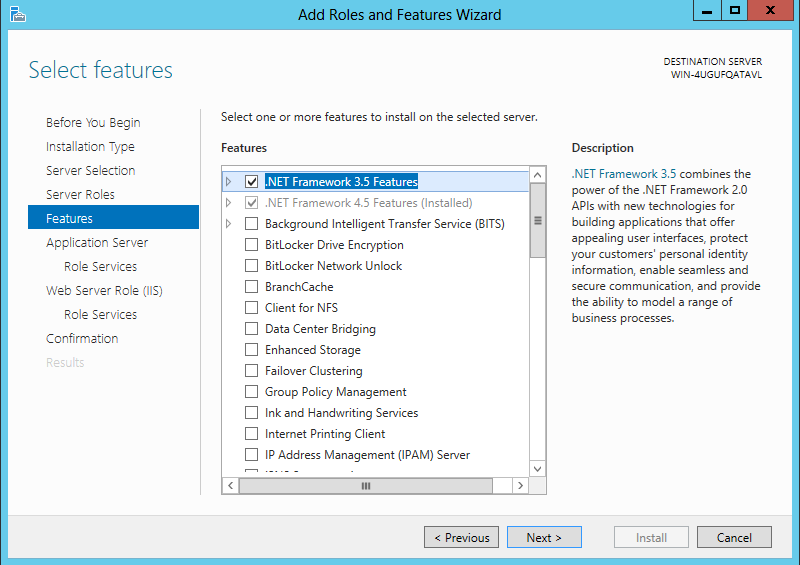
- Click "Next" and select ".NET Framework 3.5 Features":
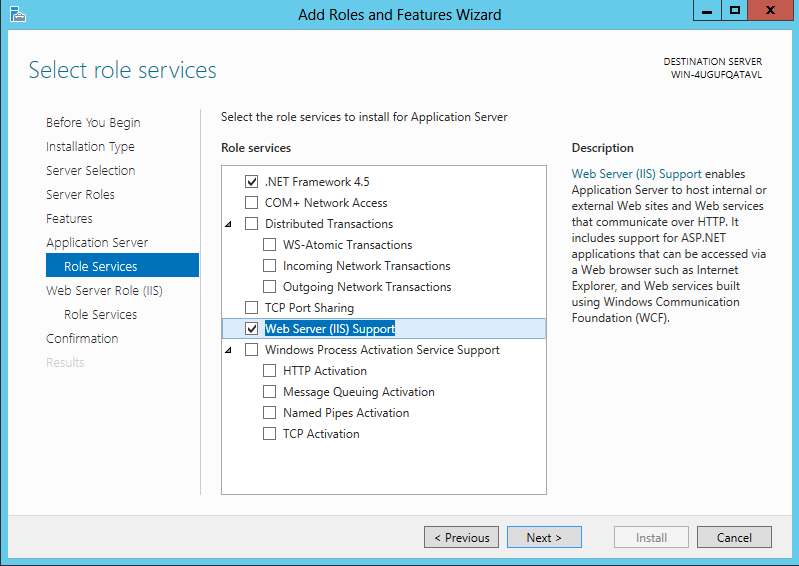
- Continue to the "Application Server" -> "Role Services" section and select "Web Server (IIS) Support":
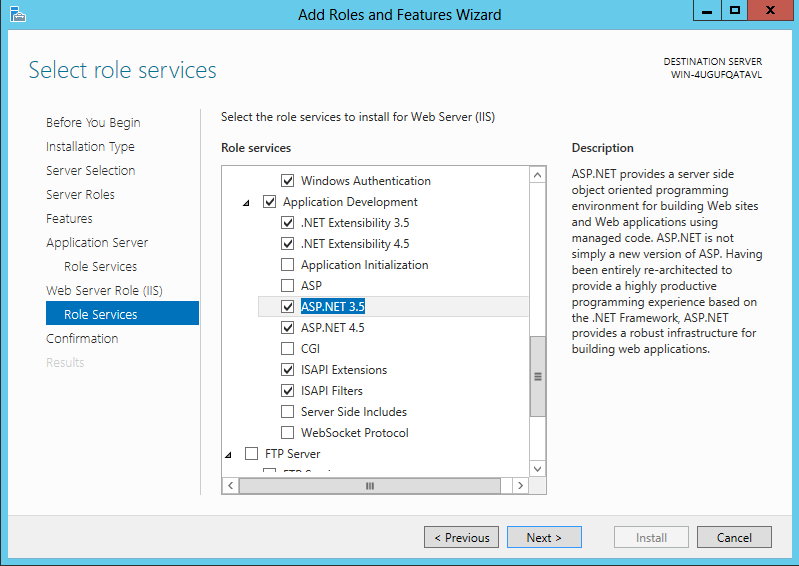
- Now go to "Web Server Role (IIS) -> "Role Services" and expand the "Application Development" node and select ".NET Extensibility 3.5" and "ASP.NET 3.5":
- Click "Next" and hit "Install".
Setting up the webdashboard:
- Download CruiseControl.NET and install it where you like (leave all the default settings).
- Open the "IIS Manager"
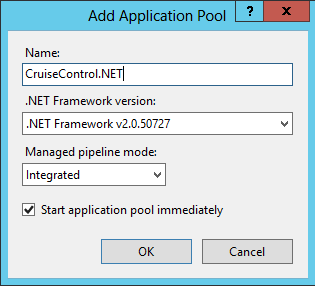
- Right click on "Application Pools" and select "Add Application Pool..." and configure it like this:
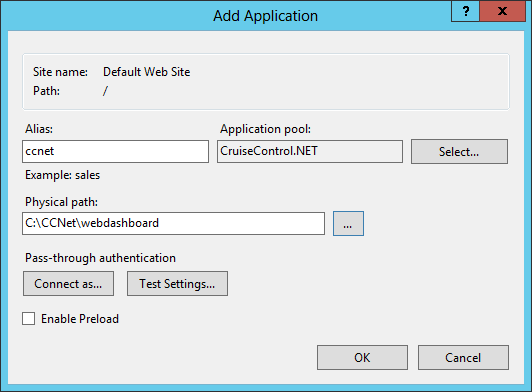
- Add a new application under the "Default Web Site" and select the just created "CruiseControl.NET" application pool and point to the path where the "webdashboard" directory of your installation is:
Configure the windows service:
- Create a new local user called "CruiseControl"
- Open the "Server Manager", click on "Tools" and select "Services".
- Search for "CruiseControl.NET Server" and open the entry
- Change the "Startup type" to "Automatic".
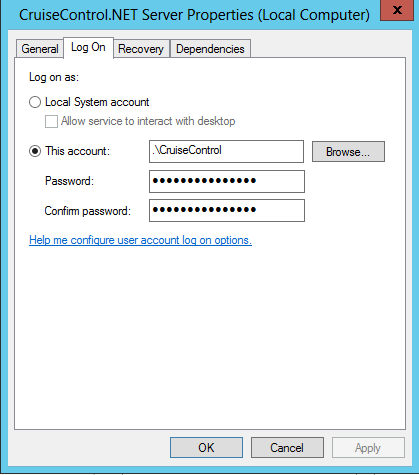
- Open the "Log On" tab, select "This account" and enter your CruiseControl account credentials:
- If you want to run integration tests on your build server that require to created windows or stuff like this you have to enable the "interact with desktop" feature for this service.
By default this is only possible when using the "Local System" account but here is a great post of how to this with every user.
- Start the service.
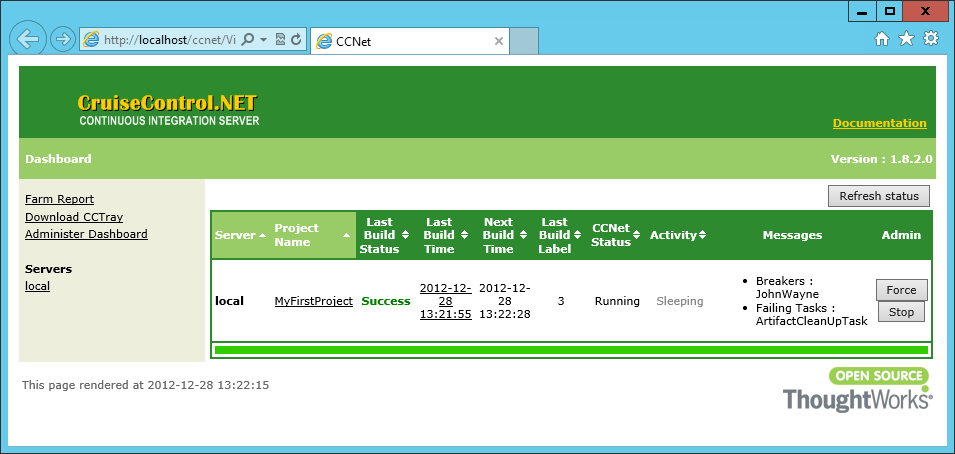
Now open http://localhost/ccnet or what ever you've configured and everything should work. Congratulation